- ITMAT Home
- Education Overview
- Resources for Teaching Faculty
- Best Practices & Technology Resources for Faculty
Best Practices & Technology Resources for Faculty
Online Teaching Best Practices
- Multiple Modes. Consider including multiple modes of instruction and sources for your courses. Having course materials in a variety of formats (text, video, interactive, etc.) help students with different learning preferences.
- Clear Communication. Tell students how, when, and why they need contact you in the syllabus or course materials, whether that means via email or office hours.
- Scaffold Assignments. Create meaningful assignments with real-world applications that are scaffolded – that is, students can submit components and receive feedback leading up to the final assessment.
- Provide Feedback Opportunities. Focusing on meaningful assignments means your feedback on student work is more valuable than ever. Feedback throughout the course can make final assignments less intimidating and increase students’ confidence. Peer review can also be a useful feedback tool.
- Create Community. Offer opportunities for students to introduce themselves and interact with one another (and with you). Group assignments, asynchronous discussions, one-on-one conferences, peer review, small groups/study sessions, and office hours are all options to build community.
- Arrive Early. Log in to the virtual session about 5-10 minutes early so you can prepare to share your presentation materials and ensure your audio and video work properly.
- Limit Noise. Mute all participants upon entry to the virtual meeting to limit background noise.
- Be Visible. We encourage you to use your video so students can see you; this will help to foster immediacy between you and students.
- Record. Remember to record each session, if the Zoom link is not automatically set to record.
- If program staff have created your Zoom links on your behalf, they will record automatically.
- Recordings will end automatically when you end the meeting. If you are holding office hours or a lengthy Q&A, you can select Pause or Stop recording.
- Enable Zoom Live Transcription. On the Zoom toolbar, select "More" and then "Live Transcript," followed by "Enable Auto-transcription" (see instructions). This simple strategy makes your Zoom sessions more accessible for everyone, including speakers of English as a second language, hearing-impaired individuals, and anyone who prefers to learn through written media.
- Take Time for Questions. Ask students more frequently than usual if they have any questions about the materials. Be comfortable with silence it may take a few minutes for students to unmute and respond.
- You won’t be able to see every student's video when you are sharing your screen so you won’t be able to read facial expressions or notice when students may not understand parts of the lecture or have questions.
- Share Resources Ahead of Time. If you have materials you would like students to review before the class, share them in a timely fashion. Also, post an announcement in your course letting students know materials are posted for their review and should be reviewed before the session.
- Create Accessible Materials. When developing your slides, make sure to follow accessibility best practices (e.g. readable font, dark colors). View the ITMAT Ed Accessibility Checklist for tips and/or check with ITMAT program staff to review accessibility.
- Taking Attendance. If you plan to take roll, do so at the beginning of class. Share the attendance sheet with program staff after class has ended. If you would like program staff to take roll, this can be arranged.
- Make Yourself Available. Consider setting up office hours for students to drop in and ask questions, these can be as frequently as needed, if possible try to pick a consistent day and time for office hours.
- For additional tips, visit CTL’s guide to Meeting Synchronously.

- Share Assignment Directions & Resources Early. Make sure any activities students should complete are finalized and shared in Canvas a minimum of 2 weeks ahead of the due date. Make sure instructions on how to use exercises or resources are clear – consider demonstrating on-screen.
- Break Up Content. Learners retain information most easily in chunks, shorter than 10 minutes. Break your lecture or materials into several smaller sections, pausing and inserting a title slide between sections. ITMAT program staff can help edit one longer video into smaller chunks, as long as we have enough time and clear demarcations.
- If Possible, Write a Script. A script will help your delivery flow, make captioning easier, and help keep lectures shorter and succinct. Anticipate what questions learners may have and incorporate them into your script.
- Make Your Lecture Evergreen. Avoid references to specific course names or dates – this way, the lecture can be used across multiple courses for multiple semesters.
- Enable Zoom Live Transcription for asynchronous lectures/recordings. On the Zoom toolbar, select "More" and then "Live Transcript," followed by "Enable Auto-transcription" (see instructions). This simple strategy makes your Zoom sessions more accessible for everyone, including speakers of English as a second language, hearing-impaired individuals, and anyone who prefers to learn through written media.
- Create Accessible Materials. When developing your slides or other materials, make sure to follow accessibility best practices (e.g. readable font, dark colors). View the ITMAT Ed Accessibility Checklist for tips and/or check with ITMAT program staff to review accessibility.
- Mistakes Happen. If you mess up during a video recording, take a few breaths and begin that section again. ITMAT program staff can edit out any false starts or issues. (If you minimize your slides/content for a few seconds before restarting, as a “reset”, that will help us edit out the mistake more easily.)
- Brainstorm Creative Options. ITMAT program staff can work with you to insert other videos, remove pieces of a lecture/mistakes, add polls, overlays (like arrows or circles or highlight on the screen), etc. in asynchronous recorded lectures. We can also help develop interactive asynchronous materials and modules. Get in touch if you're interested!
- Be Thorough. Make sure all instructions for activities are explained in detail.
- You won’t be in class to clarify and your synchronous sessions may not align with the due dates of the activities, so make sure everything is clear. Ask program staff to review - this outside perspective could be helpful, as we are a fresh set of eyes when reviewing.
- Offer Detailed Feedback. Since all grading will be completed online, make sure to be thorough with your feedback. Let students know if they have questions about feedback to reach out to you.
- Make Yourself Available. Consider setting up office hours for students to drop in and ask questions, these can be as frequently as needed, if possible try to pick a consistent day and time for office hours.
- For additional tips, visit CTL’s guide to Asynchronous Elements.
- Communicate Frequently. Using Canvas’ Announcements feature to touch base with students once a week will help keep your course and upcoming deadlines at the top of their minds.
Course Design & Development Resources
The following resources can provide you with further support during the course design and development process.
- Online Teaching Best Practices by ITMAT Education - can guide you as you develop course materials and as you teach your course.
- ITMAT Education's Course Development for Faculty guide - guide on developing ITMAT Ed courses in consultation with program staff, including timelines and steps.
- The Center for Teaching and Learning (CTL) - provides one-on-one consultations for faculty to develop and implement their course. Program staff are available to join you in these conversations if you would like to connect with them to learn more about effective teaching and learning strategies for the online environment.
- Additional CTL resources, such as:
- Inclusive Teaching Practices & Course Design – These practices are not only more inclusive but facilitate stronger learning experiences for all students
- Policies to Encourage Student Mental Health & Wellness
- Structured, Active, In-class Learning (SAIL) courses & design
- Syllabus Language & Policies – guidelines and tips for what to include
- Assessments and Exams in Online Courses – Tips and guidance for developing meaningful, high-quality assessments and assignments in online courses
- CTL events - CTL also offers workshops on various topics related to Canvas, student engagement, course design/revisions, and more. You can view the workshops and register for them through CTL events.
- Inside Higher Ed Tips for Effective Online Teaching - includes helpful tips for running your online course.
- The RISE Model for Feedback - offers a helpful tool for feedback on student assessments.
The following resources are meant to ensure that all courses include inclusive and diverse language, resources, examples, populations, etc.
- CTL’s Inclusive Teaching Guide, especially
- Racial Equity Course Review – Questions & tips to review your course materials, activities, and policies through a lens of racial equity
- Creating a syllabus that welcomes First-Generation and Low-Income (FGLI) students – Though ITMAT Ed students have frequently completed undergraduate degrees or higher, these tips are still helpful
- We recommend emailing ctl-help@lists.upenn.edu to join CTL’s listserv for inclusive & equitable teaching workshops and events
- Inclusive Language Guide – a brief KnowledgeLink module on inclusive language (what to do or not to do)
- Examples of inclusive teaching at Penn – An 11-minute video with great examples of faculty’s inclusive teaching examples
Zoom Guides & Resources
- Zoom tutorials for new users - Check out tutorials for new Zoom users.
- Using Zoom Whiteboards - Learn how to use the whiteboard feature in Zoom.
- Zoom Room Video Tutorials - Various helpful video tutorials from Zoom, some of which we highlight below.
As a teaching faculty member with ITMAT Education, you should be issued a PennKey, Penn email address, and Penn Zoom account.
To access your Penn Medicine Zoom account, please follow these directions.
If the steps above don't work, try:
- Following the same steps at https://upenn.zoom.us/ instead of https://pennmedicine.zoom.us/
- Submitting a HelpDesk ticket
- Contacting ITMAT program staff for assistance
Breakout rooms can be a great way to facilitate small group discussion in Zoom. See the video or written instructions below.
Video on Breakout Rooms
Written Instructions / Screenshots
If you plan to use breakout rooms during your synchronous sessions the following steps may help you in placing students in breakout rooms and returning students to the main room.
- First, you will need to select the breakout rooms option on the menu bar at the bottom of your Zoom meeting.
![]()
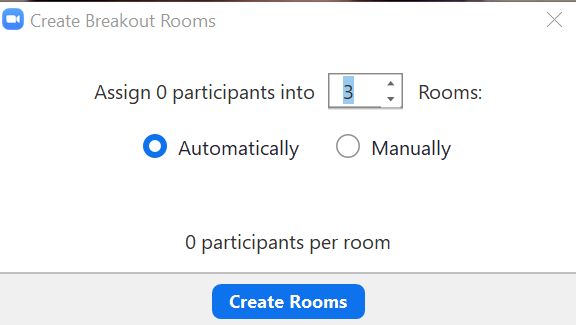
- A pop-up menu will appear asking you how many rooms you would like to create. Enter the number of breakout rooms you will need. Then, select if you would like the breakout rooms to be set up automatically or manually. Then, select create rooms.
- Automatically is selected by default and is the most efficient option.
- If your course coordinator has set pre-set up your breakout rooms this option will appear you may select “create rooms” or “yes.
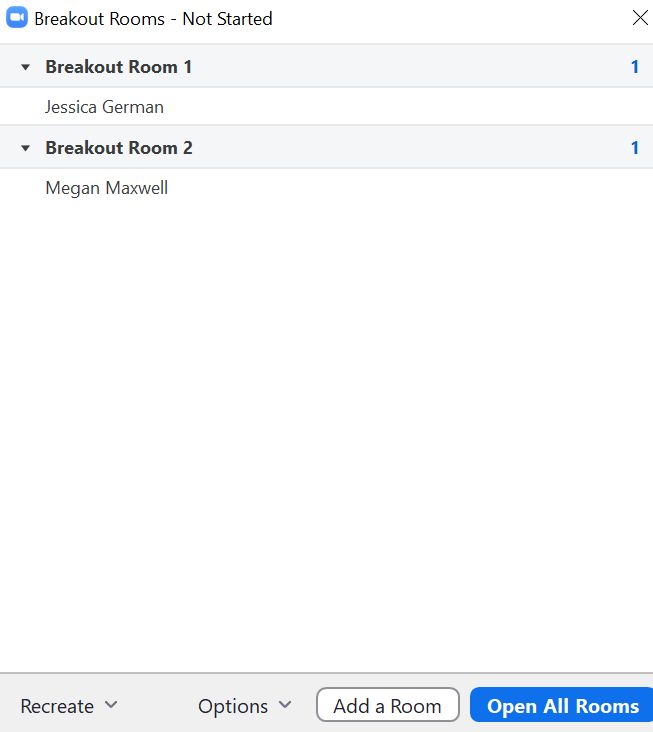
- After selecting the number of breakout rooms and the automatically or manually options a new window will appear confirming your breakout room selections. Review your selections then select “Open All Rooms”.
- If you need to move a student to a new breakout room select their name and a “move to” option will appear. You can then move them to the correct breakout room.
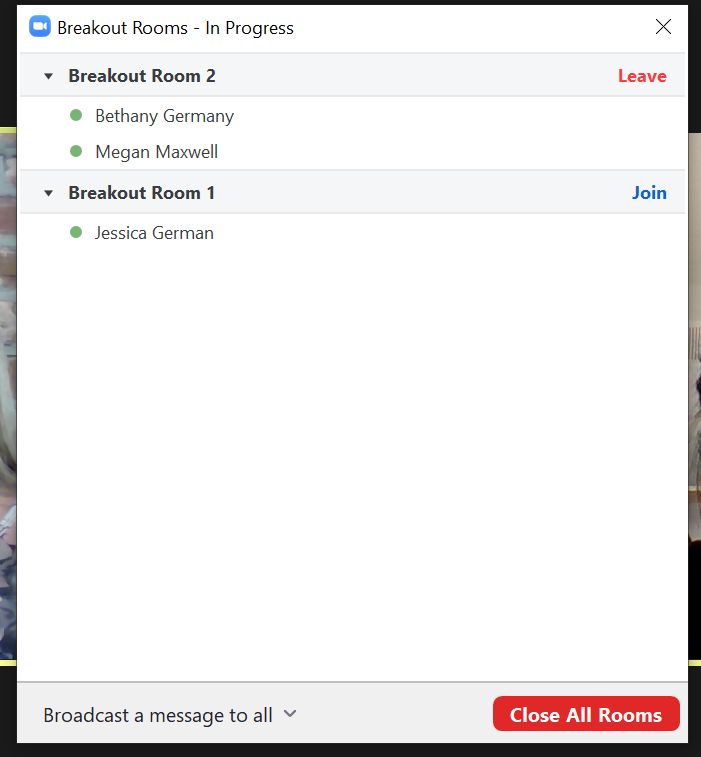
- Once the breakout rooms have been assigned and opened students will have 60 seconds to join the breakout rooms. You may join a breakout room and leave as needed.
- To join select the “Join” option. To leave select the “Leave” option

You can also send a message to all breakout rooms as needed. Select the “Broadcast a message to all” option, type your message, and select send.
- To end breakout rooms select the “Close All Rooms” option. Students will have 60 seconds to return to the main room
- If a student gets removed from the Zoom meeting while breakout rooms are in use when that student rejoins they will see the message below.
- You will see a red notification on the breakout room icon when this happens and can re-add them to the appropriate breakout room

Enabling Zoom Live Transcriptions is a best practice for teaching online. Automatic captions generated by Zoom can assist learners who are hearing impaired, learners who speak English as a second language, or any learner who values having text in addition to audio. It's easy to do and makes your content accessible. Watch the video below or read Zoom's guide on enabling live transcription.
See how educators and instructors can easily set up Zoom for office hours.
Sharing your screen for learners to see on Zoom is easy and has many more options than you might realize. Read the step-by-step tutorial from Zoom or watch the video below.
See the video below on creating a virtual classroom in Zoom. This video will cover steps such as creating reoccurring meetings for a class and setting alternative hosts.
Taking attendance just got so much easier with Zoom. See the video below.
Note that this option will only be available if you are holding class in your own Zoom room and link, that you created yourself. If a program staff member created a Zoom link on your behalf, only they will have access to the features below.
Canvas Guides & Resources
- Penn’s Canvas Course Templates – Contact ITMAT Ed program staff to apply these templates to your course build, or make your own based on them.
- Canvas Instructor Guides – Can answer almost any question you have or troubleshoot, but feel free to reach out to program staff for assistance.
- Learn how to use the Attendance feature in Canvas for synchronous classes. You can very quickly mark students as present, late, or absent. You can also use "Badges" to mark other things, such as an excused absence or contributing to class. Please let program staff know if you have questions or need assistance!
Use Announcements. The Announcements feature in Canvas is built to send information to all students in your course at once. It also houses course-related announcements in one place, so that students don’t have to dig through their emails to find important course information. Sending a weekly or biweekly recap of course content, reflections, and upcoming to-do items can also be a great way to keep students engaged in an online course. You can pre-schedule announcements as well, which is particularly helpful to do ahead of assignment deadlines or course meeting times. Program staff are happy to walk through this process with you.
- Grading Tools. Timely grading and feedback provides the best outcomes for students. Consider using SpeedGrader, a Canvas tool that makes grading fast and easy. Program staff are happy to walk through this process with you.
- File Organization. When uploading files to Canvas, we recommend storing them in specific folders rather than uploading directly into the Canvas page editor. This will make it easier to keep the course organized in future semesters, because each semester, we ask Canvas@Penn to copy the previous year's course and work from there. We recommend a file structure and folder names that look like this:

- You may choose to add additional folders if you like.
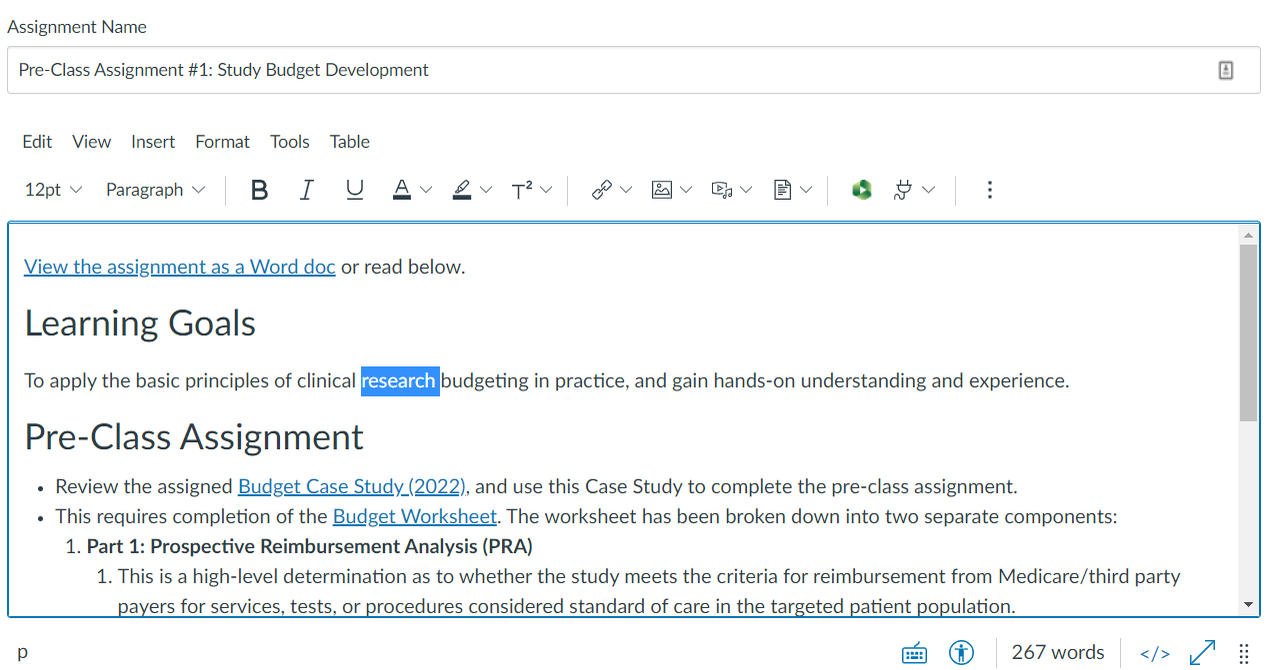
- Clear Assignment Directions. Rather than uploading Word or PDF documents with assignment instructions, we recommend using the Assignment feature on Canvas and typing or pasting instructions directly into the text box on the webpage. Additionally, use rubrics or detailed scoring guides, especially for larger projects, so students can know exactly what to expect.
- Text Directly Inside Canvas. Whenever possible, for text-based content (such as assignments, course information, etc.), instead of uploading a Word document or PDF, we recommend creating an item in Canvas (Page, Assignment, etc.) and typing or pasting the text directly into the text box. This is the most accessible way to present content and also makes content more convenient to access – students can see information directly in Canvas without having to download and open another document.
- When you type directly on a Canvas page, use the built-in text editor features (such as bold, bullets, etc.). Use the Header feature only for content headings. This is an important accessibility feature.
Tools, Tricks & Interactives
If you're looking for innovative features to try out in your courses, Canvas has many built-in options. Program staff are available to help you set up and run any of these tools.
- Canvas Collaborations - This feature sets up a common Google Doc that the entire class can access and edit. This is useful for group note-taking, small group brainstorming, etc.
- Peer reviews in Canvas - Peer reviews allow learners to look over and provide feedback on one another's work directly within Canvas. You as an instructor can then also see the feedback students provide to one another
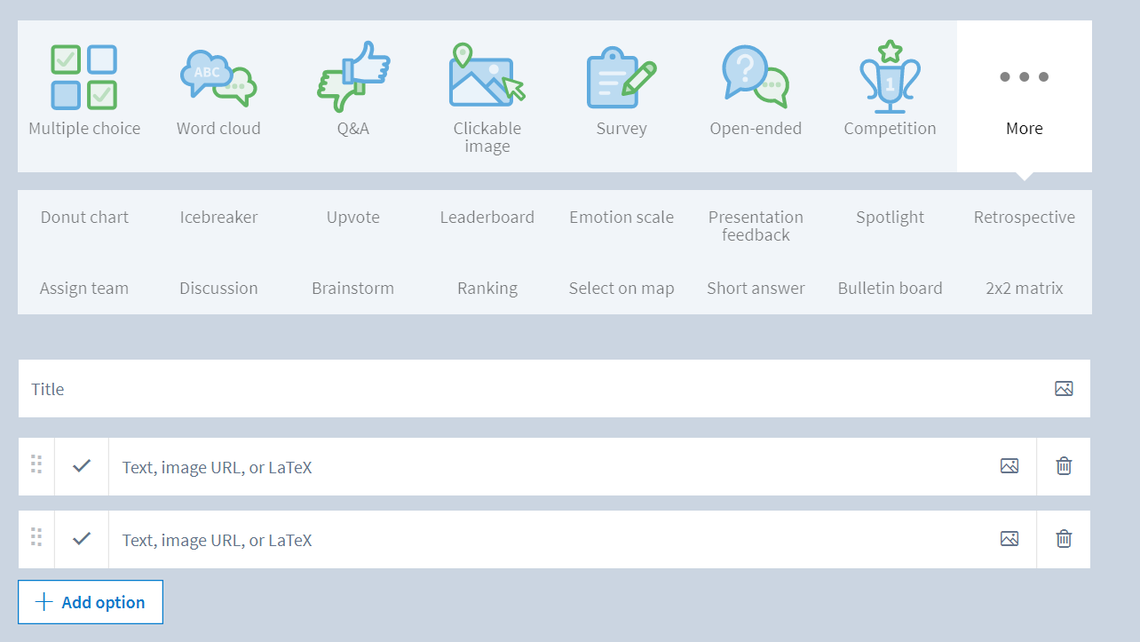
PollEverywhere - A web-based polling tool that can be used to facilitate participation/engagement, give low-stakes quizzes, etc. It can also help track attendance, allows students to anonymously submit ideas or questions, and has many more options/features than the standard Zoom polling tools.
Perusall - Perusall is an annotation tool that allows students and faculty to engage with, and transform, written material in a style akin to social media posting. Student and faculty engagement of the material in the text helps facilitate and transform class discussions. If you've ever wished students could review a document together and ask questions in real-time when they encounter them in-text, this is the tool that makes it happen!
Program staff can work with you to create eLearning modules in softwares such as Articulate Storyline and Rise.
Here's a few examples of what we can do:
Some other examples (from the Articulate website) of things we could do:
- Clinic Cleanup (sample)
- Conversations at work (sample)
- Designing for accessibility (sample)
If you're interested in creating something like these for your course, contact Nik at nkroushl@upenn.edu!